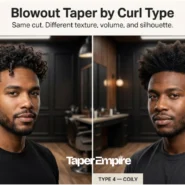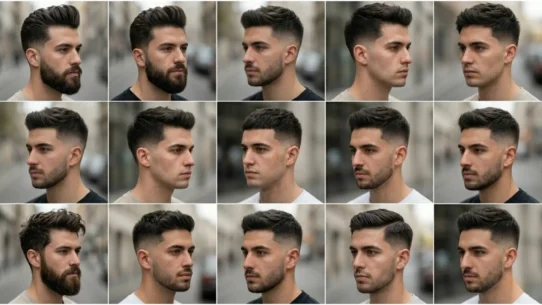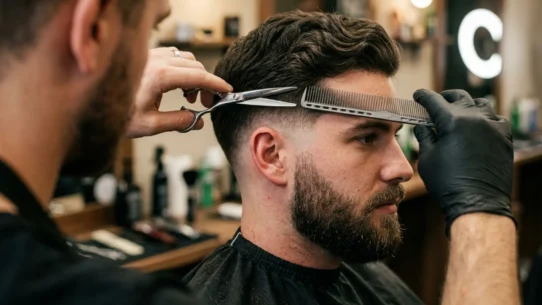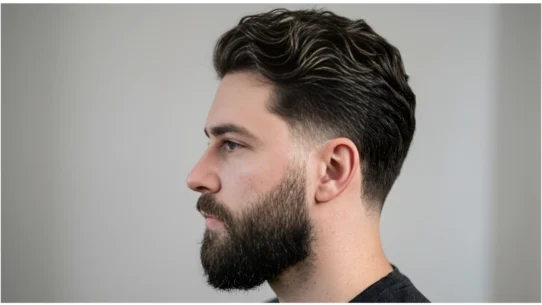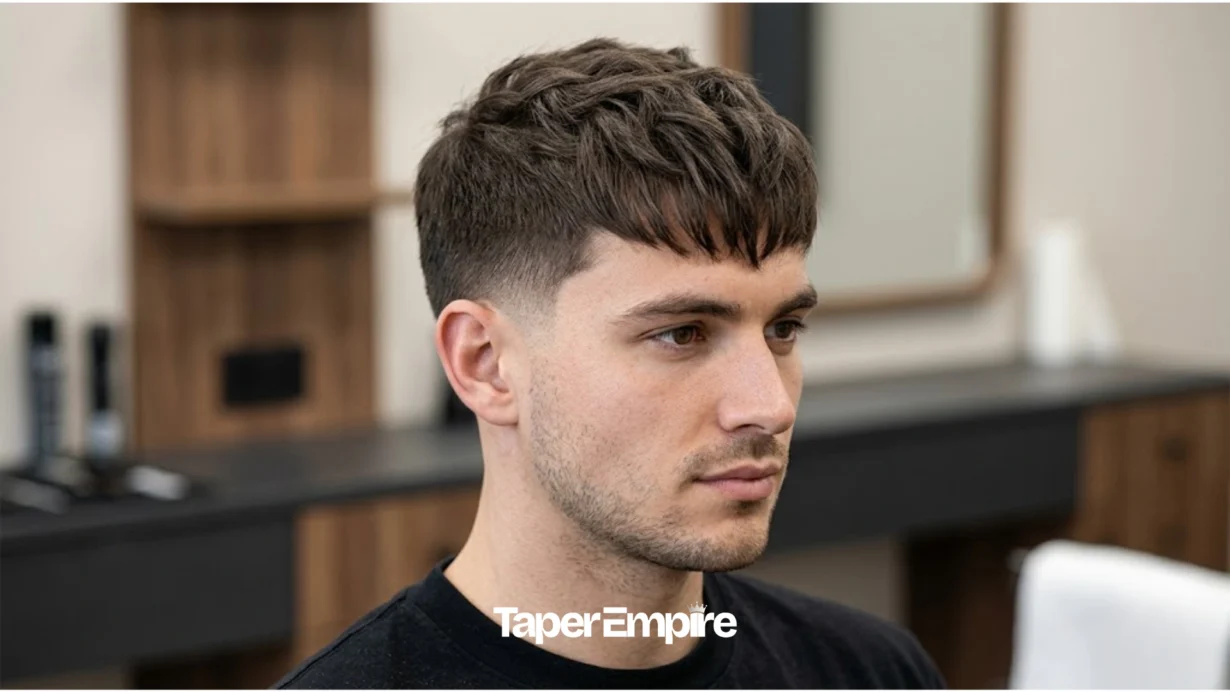

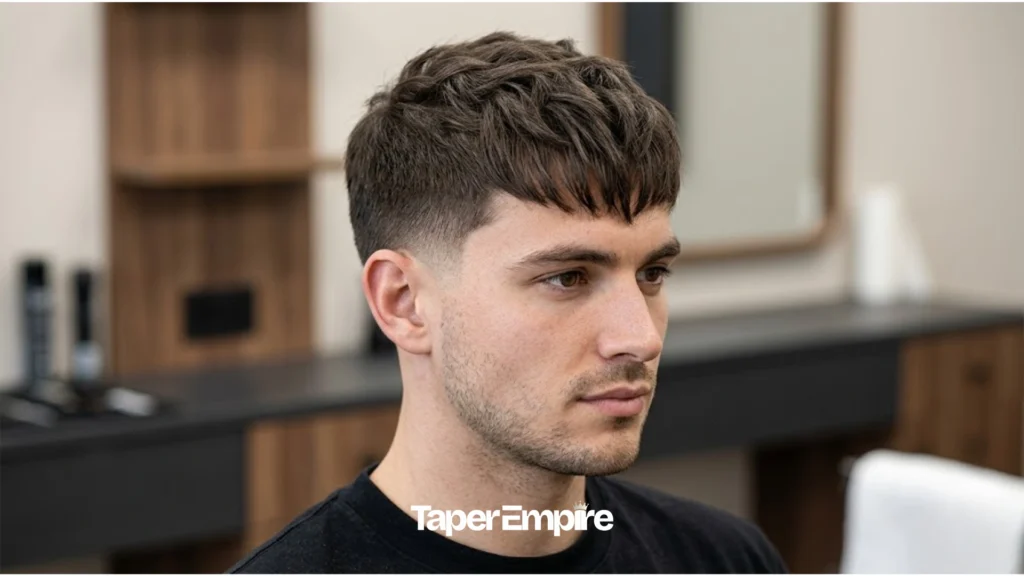
A low taper textured fringe pairs a soft, gradual fade around the ears and neckline with a forward-falling fringe cut for movement and texture. This guide covers 12 style variations, matches the cut to different hair types and face shapes, and gives you the exact wording to use in the barber’s chair. You’ll also find a full home styling routine and a clear breakdown of how this cut compares to a mid taper or skin fade.
What Is a Low-Taper Textured Fringe, and Who Should Get One?
A low taper textured fringe blends the hair gradually around the ears and neckline, while a point-cut fringe falls forward for texture and movement. It suits straight, wavy, and fine hair and works for both office and casual settings.
Key Points
- Subtle, low-maintenance fade
- Works with most face shapes
- Point-cut fringe for texture
- Office- and casual-friendly
Table of Contents
With 12 style variations ahead, it helps to see how the shape and fringe length actually sit on your own face shape before you start comparing options.
What Is a Low-Taper Textured Fringe?
A low taper textured fringe combines two separate elements: a low taper on the sides and back, and a point-cut fringe on top. The taper starts just above the ears and blends down toward the neckline without ever reaching skin level. This keeps more length on the sides than a mid or high taper, which gives the cut a softer, more natural look.
The fringe sits on top and falls forward over the forehead. A barber creates the texture using point cutting a technique where the scissors enter the hair at a 45-degree angle instead of straight across, snipping into the ends in a vertical or diagonal motion. This produces broken, uneven ends instead of one flat line, which is what gives the fringe its texture and movement.
Together, these two elements create a haircut that stays subtle on the sides while adding personality up top. The result works in an office on Monday and just as easily on a night out on Friday.
The Three Zones: How This Haircut Actually Works
Every low taper textured fringe can be broken into three zones. Understanding each one makes it much easier to describe the cut to a barber later.
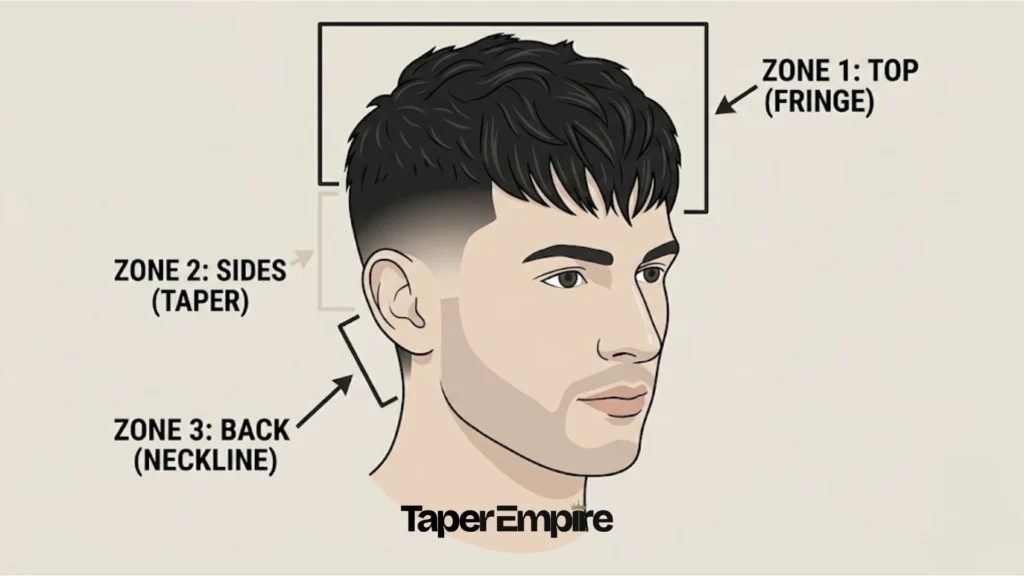
| Zone | Location | What Happens Here |
|---|---|---|
| Top | Crown and front hairline | Fringe is cut with layers and point cutting for texture. |
| Sides | Ears to temple | Taper blends gradually, no skin showing. |
| Back | Neckline | Taper ends with a clean, soft outline. |
The general fading logic behind this haircut follows the same principles used across any taper haircut, but the fringe adds a layer of styling decisions that a plain taper doesn’t need to deal with. If you’re still getting comfortable with taper terminology in general, it helps to understand the basic difference between a taper and a fade before diving into fringe-specific choices.
Low Taper Textured Fringe vs. Broccoli Haircut: Are They the Same Thing?
A broccoli haircut is a nickname for a specific version of the textured fringe, not a separate haircut. The name comes from the rounded, voluminous shape the fringe takes when it’s cut short and curly, resembling the top of a broccoli stalk.
| Attribute | Low-Taper Textured Fringe | Broccoli Haircut |
|---|---|---|
| Fringe shape | Straight or wavy, forward-falling | Rounded, curly, voluminous |
| Taper level | Any level, often low | Usually low or mid |
| Hair type | Straight, wavy, fine | Curly or coily |
| Origin | Barbershop staple | Popularized on social media |
A broccoli haircut is really just one variation of the textured fringe family, built specifically around curly hair texture. If your hair falls into that category, the cutting technique and product needs differ enough that it’s worth reading a guide built around curly hair specifically rather than trying to force straight-hair styling advice onto curls.
12 Low Taper Fringe Styles to Try
Twelve variations of this cut give you room to match the style to your hair type, face shape, and daily routine. Before scrolling through them, it helps to know which one fits you.
Which Style Should You Choose?
Use the table below to match your hair type and face shape to a starting point. You can always adjust from there once you’re in the chair.
| Hair Type | Face Shape | Recommended Style |
|---|---|---|
| Straight | Oval | Classic messy fringe |
| Straight | Round | Side-swept fringe |
| Straight | Square | Fluffy voluminous fringe |
| Straight | Long | Short forward fringe |
| Wavy | Oval | Wavy fringe |
| Wavy | Round | Voluminous wavy fringe |
| Fine | Any | Fluffy fringe with powder |
Quick Tip
Comparing 12 written descriptions is harder than seeing a couple of them mapped onto your own face shape and hair type.
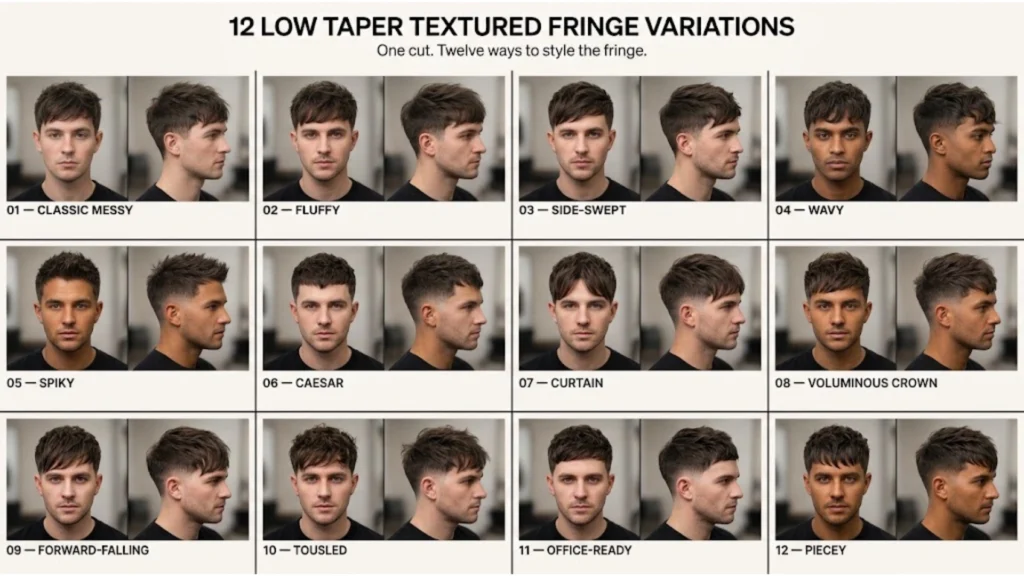
1. Classic Messy Textured Fringe
This is the most requested version of the cut. Pieces fall forward with no clean part line, giving a lived-in, effortless look. It suits straight and wavy hair on oval or square faces, and pairs well with a matte clay for medium hold.
2. Fluffy Fringe Low Taper
This style adds noticeable volume at the roots, with rounded, soft edges instead of sharp pieces. It works best on fine or straight hair and helps balance round or square faces by adding height on top.
3. Side-Swept Textured Fringe
Instead of falling straight forward, this fringe is directed diagonally across the forehead. It suits straight or wavy hair and works especially well on round or long faces, since the diagonal line breaks up width or length.
4. Wavy Fringe Low Taper
This variation leans into the natural wave pattern instead of fighting it. A sea salt spray enhances the texture that’s already there. It suits wavy hair on oval or square faces and needs the least daily product of any variation.
5. Spiky Textured Fringe
Pieces are directed upward and forward using a stronger hold product, giving a more structured look than the messy version. It works well on straight or fine hair, especially on round or oval faces.
6. Caesar Fringe Low Taper
This shorter, horizontal fringe nods to the classic Caesar cut but keeps the choppy, textured ends instead of a blunt line. It suits straight hair on oval or long faces and needs less daily maintenance than longer variations.
7. Curtain Fringe Low Taper
Parted in the centre, this fringe falls on both sides of the forehead. Textured ends stop it from looking flat or dated. It suits wavy or straight hair on oval or square faces.
8. Voluminous Crown Fringe
This is the tallest variation, with maximum height at the crown before the fringe falls forward. It works on straight hair with a blow-dry or fine hair with texture powder and suits round or square faces particularly well.
9. Forward-Falling Fringe (The Classic Version)
This is the most recognisable version of the style, with the fringe falling directly forward and covering most of the forehead. It works on nearly any hair type or face shape, which makes it the safest starting point for a first-time fringe cut.
10. Tousled Fringe with Soft Low Taper
This is the most relaxed variation, with a loose, “just got up” texture. It suits wavy or slightly curly hair on oval or diamond faces. If your hair is fully curly rather than just wavy, the cutting technique changes enough that a curly-specific guide will serve you better.
11. Office-Ready Textured Fringe
This is the same core haircut, styled with less volume and a cleaner fringe position for professional settings. It works best on straight hair, which is easiest to control for a neater finish, and suits any face shape.
12. Piecey Textured Fringe
This variation shows the most defined individual pieces, with visible gaps between strands for a sharper, more editorial look. It suits straight hair on oval or long faces and uses a stronger-hold product applied strand by strand.
If your hair is on the shorter side overall, some of these fringe lengths won’t have enough to work with, so it’s worth checking a style built for shorter hair first. If you have more length to spare, a longer-hair approach opens up a few additional variations not covered here. And if you want more height and volume than any of these twelve deliver, a blowout taper paired with a textured fringe pushes the top section much higher while keeping the same low taper on the sides.
Does This Cut Suit Your Hair and Face?
A low taper textured fringe works on straight, wavy, and fine hair, and suits most face shapes with the right variation. The technique and product choice change depending on your hair type, while the fringe length and direction change depending on your face shape.
What Hair Types Work Best with This Cut?
Straight hair doesn’t create texture on its own, so the barber relies entirely on point cutting to build in movement. Matte clay or texture powder adds the grip that straight hair lacks naturally.
Wavy hair already has built-in texture, so styling is simpler. A sea salt spray applied before blow-drying amplifies the existing wave pattern instead of fighting against it.
Fine hair benefits most from the fringe itself, since the extra length and layering at the front make the whole head look fuller. Texture powder applied at the roots adds lift before any other product goes on.
If you have straight hair specifically, a dedicated straight-hair breakdown covers the taper side of things in more depth, and the same applies to a wavy-hair version if that’s your texture.
Which Face Shapes Does This Cut Suit?
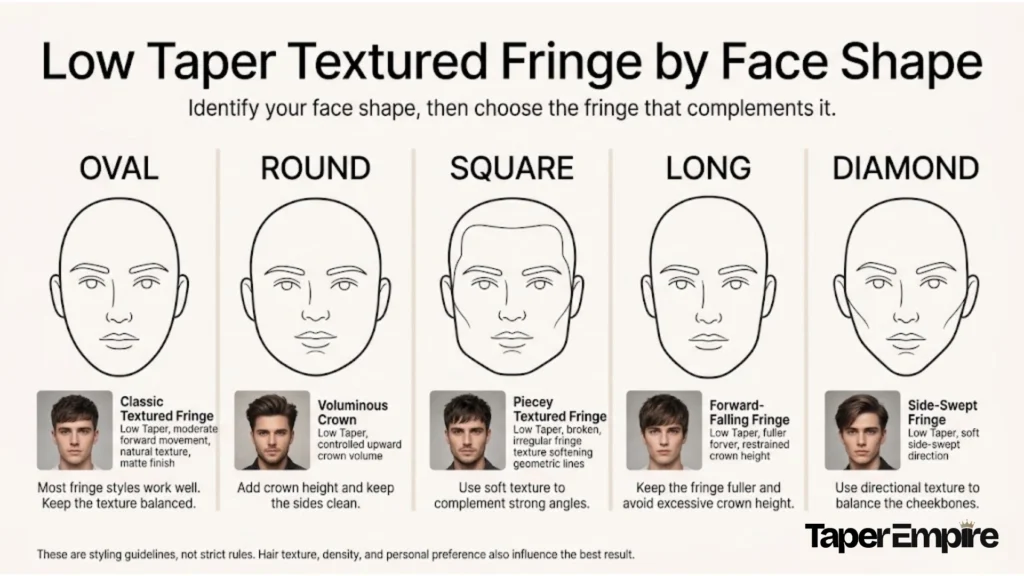
| Face Shape | Why It Works | Best Variation |
|---|---|---|
| Oval | No correction needed | Any variation |
| Round | Height and diagonal lines add length | Side-swept or voluminous crown |
| Square | Softens strong jaw angles | Fluffy or messy fringe |
| Long | Shorter fringe avoids added length | Short forward fringe or Caesar |
| Diamond | Fringe widens the midface | Tousled fringe |
This cut has limits worth knowing before you sit down. Very thick or coarse hair sometimes needs thinning shears first to stop the fringe from sitting too heavy the barber uses them to remove internal bulk before cutting the final line, allowing the fringe to sit with better movement. A fringe shorter than about 1.5 inches won’t have enough length to fall forward properly, which rules out this specific style until it grows out.
If your hair texture is coarser or coilier than straight or wavy, the cutting angles and product needs shift enough that a guide built around that hair texture will give you more accurate guidance than this one. And if you’re choosing this cut for a child rather than yourself, a lower-maintenance version made for boys simplifies both the cut and the daily upkeep.
How to Ask Your Barber for This Cut
Getting the right result starts with specific, clear wording, not vague descriptions. Barbers act on the exact words you use, so mixing up terms like “fade” and “taper” often produces a different haircut than you wanted.
The Exact Script
Use this as a starting point in the chair:
“I want a low taper starting just above my ears and blending down to the neckline — with a point-cut fringe. Keep the fringe just above my eyebrows, with choppy, textured ends, not a blunt line.”
Add these details if they apply to you:
- Guard number for the taper’s tightest point
- How much daily styling time you’re willing to spend
- Whether you want a more structured or messier finish
What NOT to Say: 4 Common Mix-Ups
| What You Say | What the Barber Hears | What to Say Instead |
|---|---|---|
| “Give me a low fade” | Blend all the way to skin | “Low taper, not a skin fade” |
| “Just make it textured” | No clear direction | “Point cut the fringe so pieces fall separately” |
| “Cut the fringe straight across” | Blunt, flat line | “Keep the ends choppy and uneven” |
| “Keep it natural” | No specific instruction | “I want it falling forward with visible separation” |
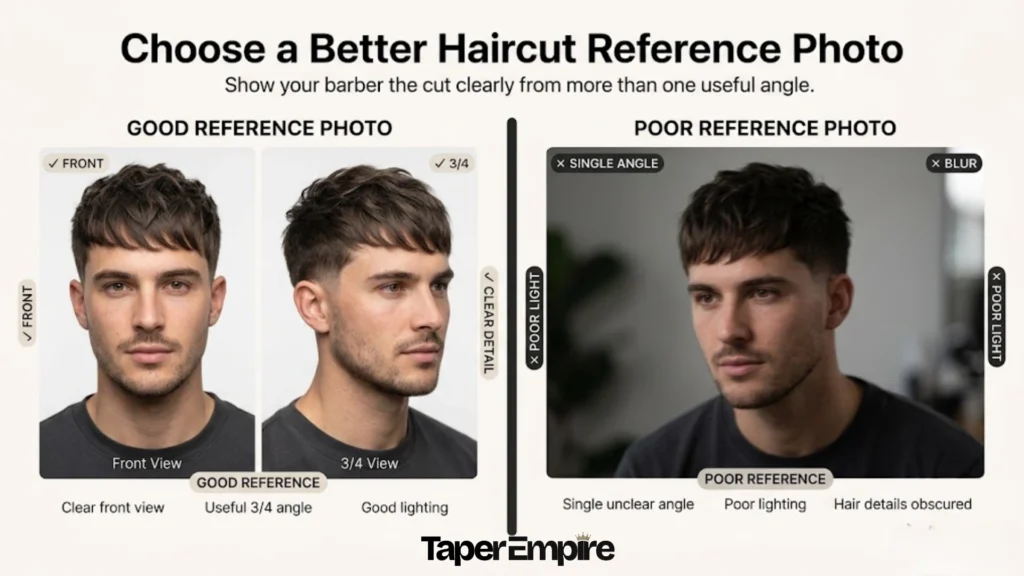
How to Use a Reference Photo Effectively
A photo removes almost all the guesswork that comes with verbal descriptions alone.
- Pick a photo showing both a front angle and a three-quarter angle
- Match the photo to your own hair type straight to straight, wavy to wavy
- Show the photo before the barber starts cutting, not partway through
- Point to the specific detail you want, like taper height or fringe length, instead of the whole look at once
- Ask directly whether the style is realistic for your hair type
Quick Tip
A photo of your own face and hair type communicates more accurately than a generic reference image of someone else.
If you decide a slightly bolder version suits you better, the same request structure applies to a mid taper you just move the blend point higher and adjust the wording accordingly.
How to Style It at Home
Daily styling for this cut takes about five minutes once you know the right sequence for your hair type. The steps below are grouped by texture, since straight, wavy, and fine hair each need a different approach.
Styling Routine for Straight Hair
- Towel-dry hair until it’s about 70% dry, not soaking wet
- Apply a thickening spray through the fringe section
- Blow-dry forward and downward, lifting at the roots with your fingers
- Rub a pea-sized amount of matte clay between your palms until it turns translucent
- Work the clay through the fringe from root to tip, separating pieces with your fingertips
Styling Routine for Wavy Hair
- Apply sea salt spray to damp hair from root to mid-length
- Scrunch upward through the fringe to encourage the natural wave
- Let hair air-dry about 80% of the way, or diffuse on low heat
- Work a light matte clay or curl cream through the fringe, raking pieces apart
- Direct the fringe forward with your fingertips and let the wave settle naturally
Styling Routine for Fine Hair
- Apply texture powder directly to dry roots before anything else
- Lift hair at the root with a blow-dryer nozzle while applying heat
- Add a small amount of thickening spray to the mid-lengths only
- Use half a pea-sized amount of matte clay, spread thin, on the tips only
- Flick pieces apart with your fingertips instead of raking, which can flatten fine hair
Why Does Your Fringe Go Flat During the Day?
A flat fringe usually comes down to one of four causes. Too much product weighs fine hair down, so cutting back the amount often fixes it immediately. Product applied to fully wet hair dilutes and slides off instead of gripping, so waiting until hair is about 70% dry works better. Skipping the root lift during blow-drying leaves no foundation for the product to hold onto. And product buildup across several days without washing makes the fringe heavier over time, so rinsing with water only on non-wash days, or using a small amount of dry shampoo at the roots, resets the volume.
Best Products for a Textured Fringe
The right product depends on your hair type and how much hold you need. This table breaks down the main options by function, not just by name.
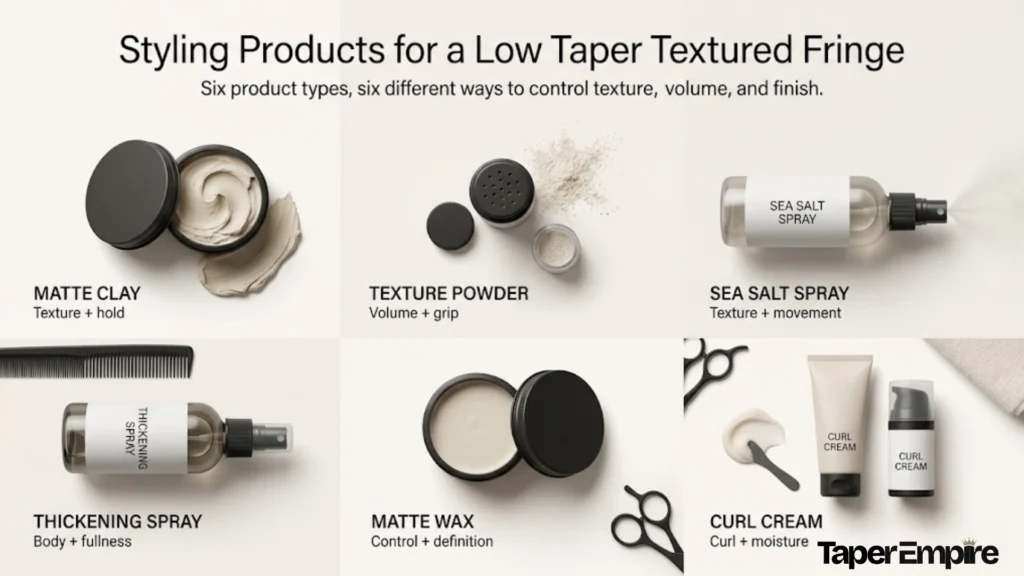
| Product | Hold Level | Finish | Best For | Apply To |
|---|---|---|---|---|
| Matte clay | Medium | Matte | Straight, wavy | Mid-length to tips, on damp hair |
| Texture powder | Light, lifting | Matte | Fine, flat hair | Roots, on dry hair |
| Sea salt spray | Light | Natural texture | Wavy hair | Root to mid-length, on damp hair |
| Thickening spray | Light, volumizing | Volume | Fine, straight | Mid-length, before blow-drying |
| Matte wax | Medium-strong | Low matte | Straight, coarser hair | Tips and pieces, on dry hair |
| Curl cream | Light | Soft, natural | Wavy hair | Mid-length to tips, on damp hair |
High-shine gels and pomades work against this style rather than for it. A shine finish coats each strand and flattens the separation that makes a textured fringe look textured in the first place. The same goes for heavy waxes on fine hair, which weigh the fringe down until it loses its lift by midday.
Low Taper vs. Mid Taper vs. Skin Fade
The main difference between these options comes down to where the blend starts and how far it goes. A low taper keeps most of the length on the sides and never touches skin, while a skin fade goes all the way down to zero at its lowest point.
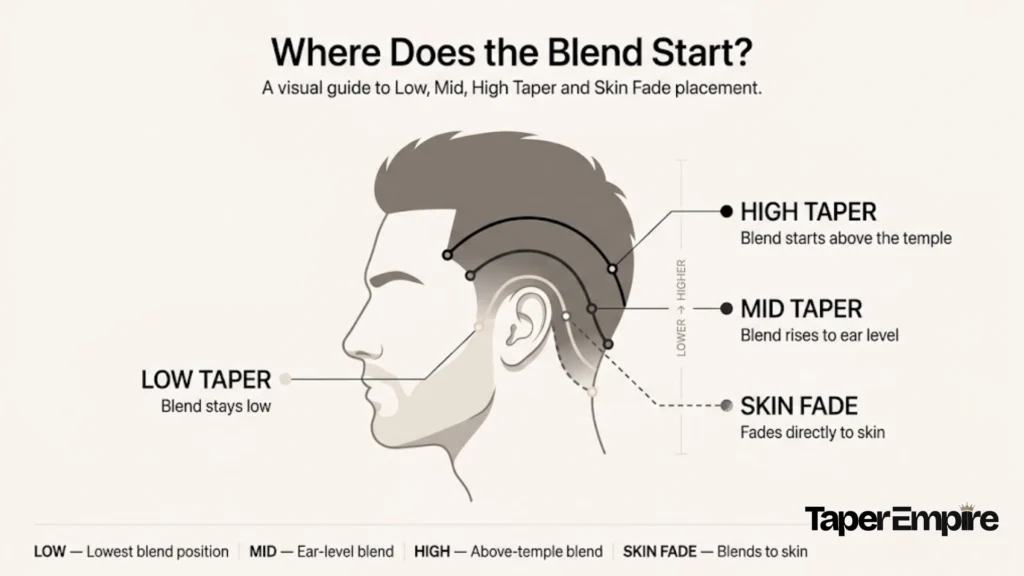
| Option | Where Blending Starts | Goes to Skin? | Contrast Level |
|---|---|---|---|
| Low taper | Just above the ear | No | Subtle |
| Low taper fade | Just above the ear | Yes, at the neckline | Medium |
| Mid taper | Temple area | No | Medium |
| High taper | At or above the temple | No | High |
| Skin fade | Varies | Yes, full length | Very high |
For a first fringe haircut or a professional setting, the low taper is the easier starting point. It needs less frequent trims and keeps a softer look overall. If you want more edge later, moving up to a low taper fade or a full skin fade adds contrast at the cost of more frequent barbershop visits.
This summary covers the basics, but if you want the complete breakdown between a taper and a fade, or a full three-way comparison across every taper height, those dedicated comparisons go into far more depth than fits here. The same applies if you’re specifically weighing a skin fade against a taper fade, or want to see the full range of fade types beyond what’s relevant to a fringe pairing. If you land on wanting more contrast than a low taper offers, both mid taper and high taper styles are worth a look. And if a low taper that blends fully to skin appeals to you specifically, that variation is covered on its own as well.
How Often Should You Trim It?
Trim frequency depends on how tight your taper is, not a single fixed number. A soft low taper that never reaches skin holds its shape longer than one blended down to skin level at the neckline.
| Taper Type | Side Trim Frequency | Fringe Trim Frequency |
|---|---|---|
| Soft low taper (no skin) | Every 4–5 weeks | Every 3–4 weeks |
| Low taper fade (to skin) | Every 2–3 weeks | Every 3–4 weeks |
According to the American Academy of Dermatology, hair grows at an average rate of about half an inch per month which is why a skin-level blend shows regrowth faster than a softer taper. Climate, hair density, and how precisely the fringe was cut all affect how quickly the style starts looking overgrown.
Trimming your own fringe between full appointments is possible if you’re careful. Use sharp scissors only, work on dry hair, and trim small sections at a time using the same point-cutting angle your barber used, rather than a straight cut across.
Frequently Asked Questions
What do I actually say to my barber to get a low taper textured fringe?
Tell your barber: “I want a low taper starting just above the ear and blending to the neckline, with a point-cut fringe sitting just above my eyebrows and choppy, not blunt, ends.” Bring a reference photo showing both a front and side angle.
What is the difference between a low taper and a low fade?
A low taper gradually reduces hair length but never reaches the skin. A low fade blends all the way down to skin level. The taper looks softer and needs fewer trims, while the fade creates sharper contrast and grows out faster.
Does a low taper textured fringe work on straight hair?
Yes. A barber builds texture into straight hair using point cutting, which creates broken, uneven ends instead of a flat line. Matte clay or texture powder then adds the grip straight hair needs to hold that texture through the day.
How often should I trim a low taper textured fringe?
Trim the sides every 4–5 weeks for a soft taper, or every 2–3 weeks if it blends to skin. Trim the fringe separately every 3–4 weeks to keep it sitting just above your eyebrows.
What is the difference between a textured fringe and a curtain fringe?
A textured fringe falls forward as one section covering the forehead. A curtain fringe parts in the center and falls to both sides. Both can use the same point-cutting technique, but they frame the face very differently.
Why does my textured fringe go flat during the day?
Three common causes: too much product weighing hair down, product applied to hair that’s still too wet, or no root lift during blow-drying. Using less product, waiting until hair is 70% dry, and lifting at the root usually fixes it.
Final Thoughts
A low taper textured fringe works because it separates two decisions that used to feel like one. The taper stays subtle and low-maintenance on the sides, while the fringe on top gives you room to adjust volume, direction, and texture based on your hair type and face shape.
Start by matching your hair type and face shape to one of the twelve variations above, then use the exact wording from the barber communication section to make sure you both start from the same picture. If you’re still deciding between a couple of options, seeing them mapped onto your own photo removes most of the guesswork before you ever sit in the chair.
Quick Tip
If you’ve narrowed it down to a couple of styles but can’t picture the difference on yourself, a personalized preview settles it faster than scrolling through more photos of other people.