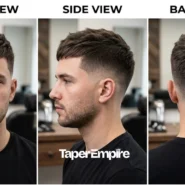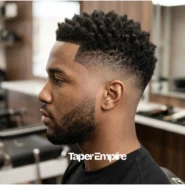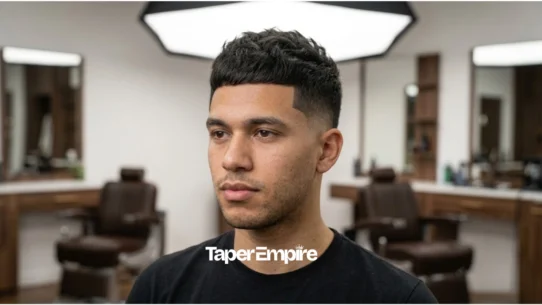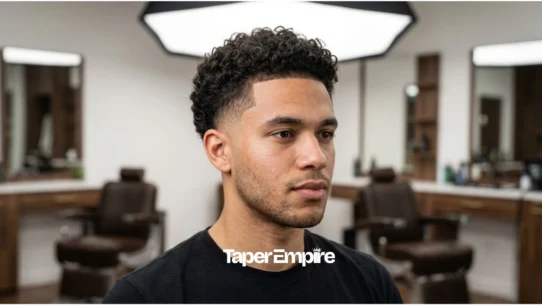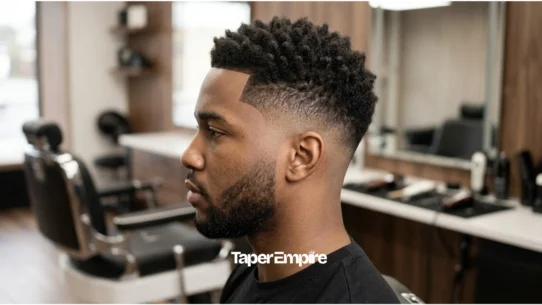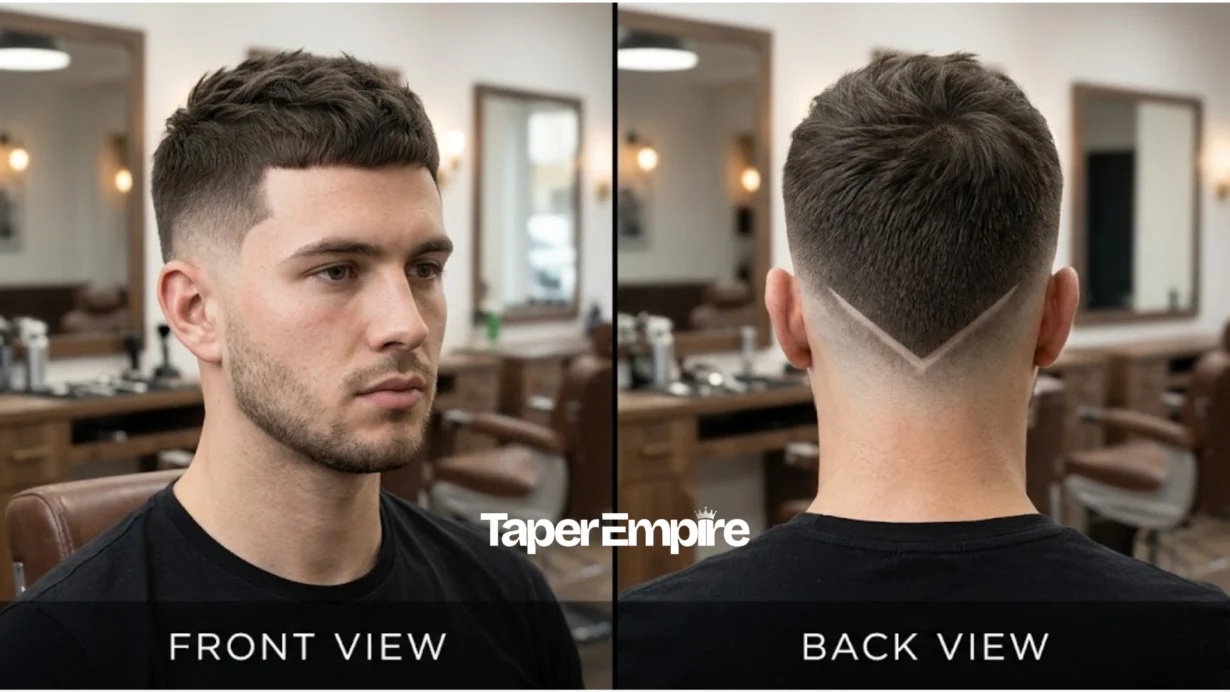

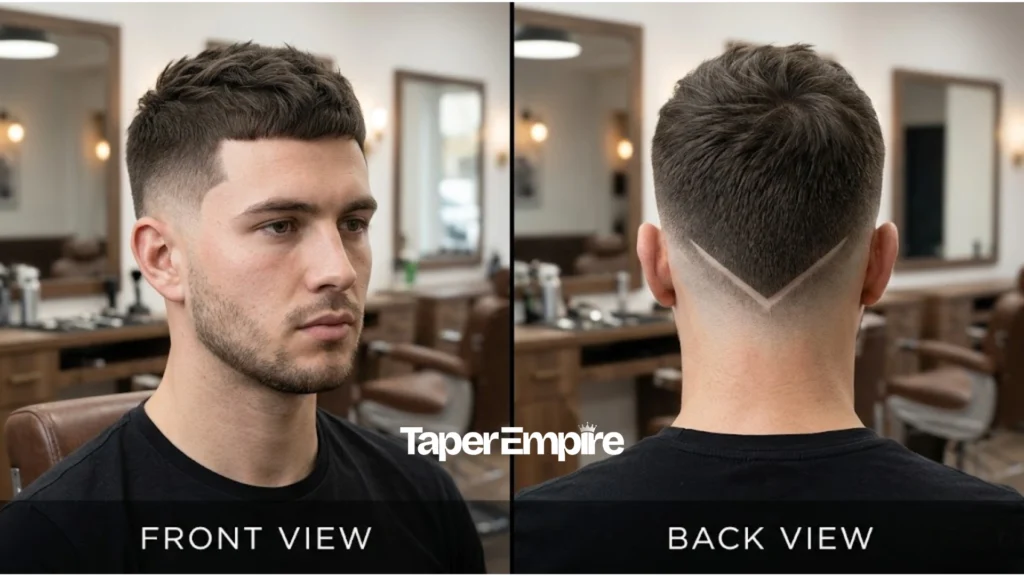
Mid taper designs combine a gradual hair blend starting at the temple-to-ear midpoint with shaved patterns lines, geometric shapes, or freestyle artwork positioned at the nape, sides, or both.
Most people choose the wrong design before they even sit in the chair. They pick a style from a side-profile photo, request it with vague language, and walk out with something that doesn’t match their vision.
This guide fixes that. Inside, you’ll find 45 categorized design ideas including dedicated back-view and nape galleries a four-part barber script you can read directly from your phone, and a hair-type compatibility guide that matches the right design to your texture.
What Is a Mid Taper Design?
A mid-taper design is a haircut that blends hair gradually from the temple-to-ear midpoint while adding shaved patterns such as lines, geometric shapes, or freestyle art at the nape or sides. Designs stay visible for 7–14 days and require touch-ups every 10–14 days.
- Starts at the temple-to-ear midpoint
- Design placed at the nape, side, or both
- Suits all hair textures and densities
- Touch-up every 10 to 14 days for a crisp design
Table of Contents
What Is a Mid Taper (and How Is It Different from a Mid Fade)?
According to professional barber education standards such as Milady, a mid taper fade typically begins around the middle of the sides and back of the head, with the blend starting near the temple and curving behind the ear while leaving more weight above than a high taper.
The taper and the fade are not the same cut. Many people use the terms interchangeably, but barbers treat them as distinct techniques with different outcomes.
| Attribute | Mid Taper | Mid Fade |
|---|---|---|
| Starting Point | Temple-to-ear midpoint | Temple-to-ear midpoint |
| Shortest Length | Guard #1 or #2 (never skin) | Skin (0 guard) |
| Transition Style | Gradual, soft gradient | Sharp, dramatic contrast |
| Maintenance Frequency | Every 3–4 weeks | Every 2–3 weeks |
| Overall Look | Clean, structured, professional | High-contrast, bold |
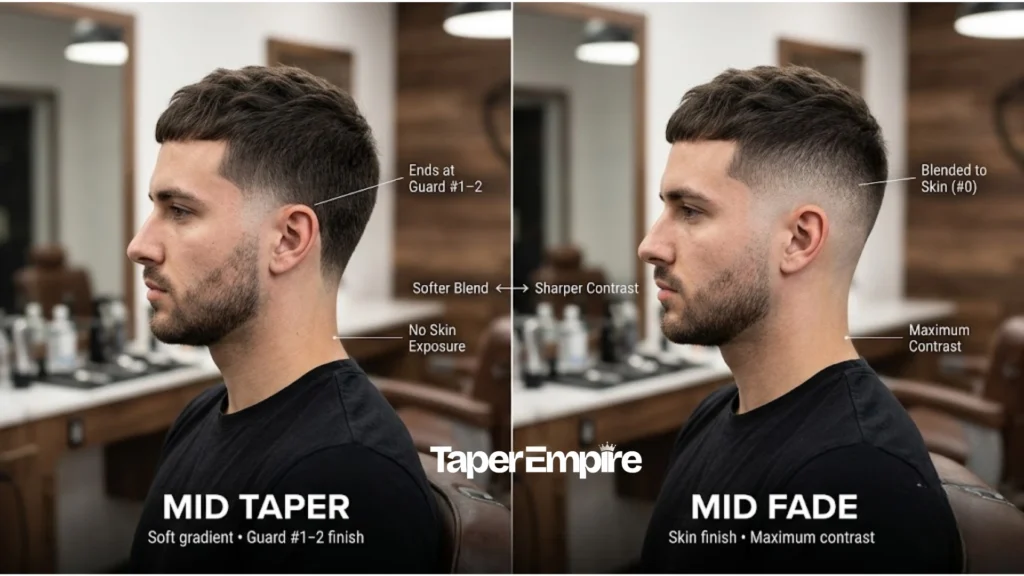
The taper produces a softer gradient because it stops at a guard length rather than going to bare skin. The mid fade starts at the same height but shaves all the way down, creating higher contrast at the neckline and sides. Both can carry shaved designs but the mid taper base makes designs appear slightly more subdued overall, which is why it suits both professional and casual environments.
Barbers measure the starting point by placing two fingers horizontally above the ear. This ensures the blend begins at a consistent height across different head sizes and hair densities.
If you’re still deciding between a mid taper, a low taper, or a high taper, the comparison between all three levels covers the full range of placement options and who each one suits best.
Mid Taper Design Ideas (Categorized by Placement & Complexity)
Mid taper designs fall into three complexity levels. Your hair type, lifestyle, and how often you can visit a barber should all factor into which category makes sense for you.
Quick Tip
Not sure which design will suit your face shape and hair texture before you sit in the chair? Taper Empire’s AI haircut tool lets you preview styles on your own photo so you can walk into the barbershop with a clear visual reference.
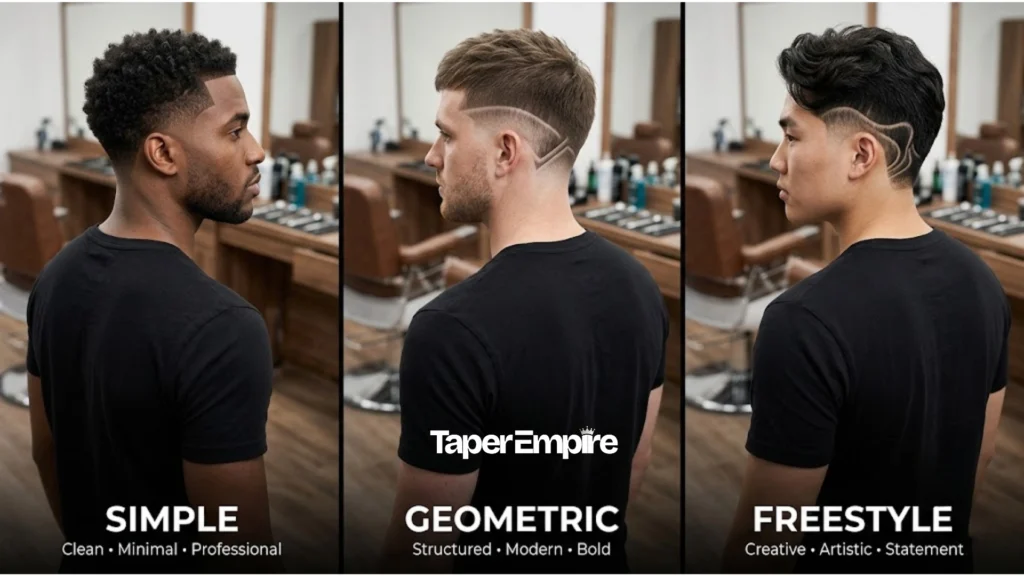
Simple Designs (Office-Safe)
Single-line designs are the most common starting point. They age the most gracefully as hair grows and they work across every professional environment.
Single Horizontal Temple Line A straight or slightly curved line shaved at the temple, running parallel to the natural hairline. Best for straight and wavy hair. Stays clean and sharp for 10–14 days on Type 1 and Type 2 hair.
Curved Temple-to-Nape Slash: A single curved line that starts at the temple and sweeps toward the nape. It creates back-and-side visibility from multiple angles without demanding intricate execution. This design works particularly well when the top is styled back or to the side.
Minimal Hard Part: A shaved part line that sits on the natural side part, reinforcing the taper with a clean visual break. It reads as structured rather than bold. Ideal for corporate settings or school dress codes.
Hair-type note: Simple designs work on all hair textures. On Type 4 (coily) hair, a single bold line holds its shape better than multiple fine lines.
Geometric Designs (Statement Styles)
Geometric designs include two or more connecting lines, angles, or shapes. They attract more attention than single-line designs but remain structured and intentional.
Triangle at Temple: A small, sharp triangle shaved at the temple point facing downward or toward the ear. It pairs well with natural or textured tops because the structured geometry contrasts the organic texture above.
Cross Design at Nape: Two perpendicular lines crossing at the center of the nape. The cross sits at the back of the head, visible only from behind. It adds visual interest without affecting the front or side profile at all.
Chevron Pattern: A V-shaped line that can wrap from one side of the head across the nape to the other. When executed across the full nape, it creates a dramatic back view that reads differently from every angle.
M Design: The letter M shaved at the temple or hairline is a well-established geometric pattern in barbering. It suits clients who want something recognizable rather than abstract.
Hair type note: According to professional barber educators, geometric hair designs remain sharpest on Type 1 (straight) and Type 2A (slightly wavy) hair because the straighter hair shaft makes etched lines and corners more visible. On Type 3 and Type 4 hair, natural curl patterns and volume can cause sharp edges to appear softer as the haircut grows out, often requiring more frequent touch-ups to maintain crisp definition.
Freestyle Designs (Maximum Creativity)
Freestyle designs are executed freehand by the barber with a razor or open clipper blade. No two are exactly alike, which is both their strength and the source of the highest execution risk.
Lightning Bolt: A classic barbershop design. The bolt starts at the temple and angles downward. Length and number of zigzag points varies by barber and client preference.
Tribal Pattern Nape Wrap Geometric tribal-inspired shapes centered at the nape, extending upward and outward. These take the longest to execute and have the highest touch-up requirement expect significant blurring within 5–7 days on faster-growing hair.
Custom Initials or Symbols Shaved letters or personal symbols (stars, crosses, crowns) remain popular, especially at the temple or on the back panel. Complexity varies by design. Bring a clear printed or digital reference image to avoid interpretation errors.
Hair type note: Professional barber educators note that intricate freestyle hair designs tend to lose their crisp appearance more quickly on Type 4 coily hair because tightly coiled strands naturally soften the edges of etched lines as the hair grows. Choosing a simpler, well-executed design often helps maintain a cleaner look between appointments.
What Are the Best Mid Taper Design Ideas for the Back of the Head?
The back view is the most underserved angle in mid-taper content most galleries show side profiles. A design positioned at the nape creates an entirely separate visual statement that only reveals itself when the wearer turns around.
Four nape-specific design types cover the majority of back-view requests.
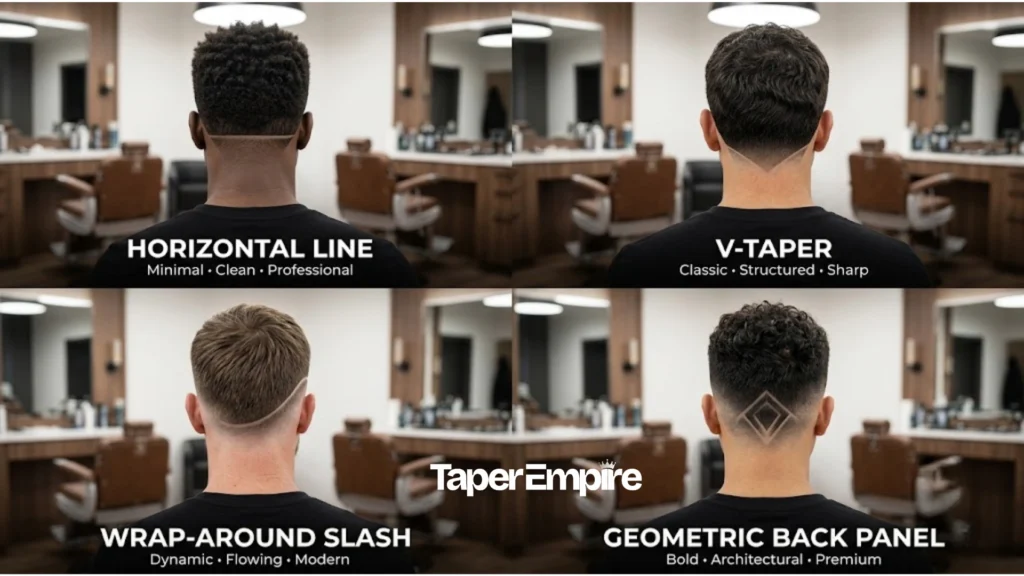
Nape-Specific Design Types
1. Horizontal Line Across Nape: A single straight or slightly curved line running across the full width of the nape. This works best on heads with a rounded occipital bone. The bone’s natural protrusion creates a flat surface for the line to sit on, keeping it level. On a flat occipital bone, the same horizontal line will appear uneven from certain angles.
2. V-Taper Design: A V-shape. The external occipital protuberance (EOP), the bony prominence at the back of the skull, varies naturally in size and shape among adults. A V-shaped nape design can visually elongate the back of the head, making it a popular barbering choice for clients with a flatter occipital profile because the downward point draws the eye vertically.
3. Curved Slash from Temple to Nape: A design that starts at the temple on one side and sweeps across the back of the head toward the nape on the opposite side. Visible from the side, back, and three-quarter angles simultaneously. This is the highest-visibility design option in the back-view category.
4. Geometric Back Panel: A triangle, diamond, or chevron centered on the occipital bone. Symmetry is critical here; any inconsistency is immediately visible from the back. Always ask your barber to use the center of the nape as a reference point before shaving.
A flat occipital bone changes how designs read from behind. Barbers who specialize in back designs will feel the occipital bone before choosing placement if yours doesn’t, tell them the bone is flat and ask them to recommend placement accordingly.
Back designs require someone else to check the grow-out. You cannot see the back of your own head clearly enough to monitor blur. Schedule touch-ups every 10–14 days or ask a trusted person to photograph the nape weekly.
Mid-Taper Side Designs (Temple & Sideburn Placement)
Side designs are visible from the front and three-quarter angles, the angles people see most often in conversation and photographs. They tend to carry more daily social impact than backpacks.
Side Design Placement Options
1. Temple Line: A single or double curved line shaved at the temple, sitting just above or along the natural hairline. The single line is the cleaner, more versatile choice. A double line (two parallel curved lines) creates a bolder effect.
2. Hard Part: A shaved side part line that replaces a natural part. It works best on clients who already part their hair naturally; the design reinforces the existing part and looks deliberate rather than random. When the part is wet-combed down, the hard part disappears into the style. When the hair is pushed back or to the side, it becomes visible.
3. Sideburn Design: A geometric pattern, most commonly a short vertical line, triangle, or small lightning bolt, placed within the sideburn area where it meets the mid-taper. This placement is compact and reads subtly at most viewing distances.
Side designs work best when they follow the natural direction of the hairline. A design that cuts against the natural growth direction at the temple will distort as hair grows, looking unintentional within a week.
What Should I Tell My Barber to Get a Mid-Taper Design?
Clear communication prevents the most common post-haircut disappointment: the result looked nothing like the reference image. Barbers can only execute what they understand, and “something cool on the side” gives them almost nothing to work with.
Use the four-part script below. Customize each section for your specific cut.
The 4-Part Barber Communication Script
Part 1 — The Base Cut
“Mid taper, starting at the temple/eyebrow level, blend from [#4 guard at the top down to [#2 guard] at mid-point, finishing at [#1 guard at the nape. Keep the neckline [tapered/rounded/blocked].”
Guard number reference:
- #4 guard = 12mm of hair length [VERIFY: Wahl or Andis clipper guard specifications]
- #2 guard = 6mm
- #1 guard = 3mm
- 0 guard = 0.5mm (near-skin; used for the design itself)
Part 2 — The Design Placement
“Add a [single curved line / V-taper / triangle / chevron] at the [temple / nape / side]. Use a [0 guard / razor] for the design. Keep it centered on the [nape / left temple].”
If you want a back design:
“Position the design at the nape, centered on the occipital bone. Reference the center of the nape before you start the lines.”
Part 3 — The Top Style
“Leave [2 inches / 3 inches] on top for a [textured crop / slick back / fringe / natural]. [Scissor-cut / clipper-cut] the top with [texture / clean lines].”
Part 4 — The Finishing Details
“Line-up at the hairline and sideburns. Keep the edges sharp. Don’t taper the back neckline I want the design to sit on a defined edge.”
Clients who bring a screenshot and point to the exact design placement get significantly closer to their desired result than those who describe the cut verbally. Take a screenshot of the closest reference image from this gallery, mark the angle (front, side, or back) with a note, and show it to your barber before they pick up any tools.
Quick Tip
If you’ve found a design in this gallery but aren’t sure how it will look on your specific head shape, use Taper Empire’s AI tool to preview the style before your appointment — and download the result to show your barber directly.
Do Mid Taper Designs Work with My Hair Type?
Mid taper designs work on all four hair texture types, but the design’s visibility duration and the complexity you choose should both vary significantly by texture.
Mid Taper Design Compatibility by Hair Type
| Hair Type | Design Visibility Duration | Best Design Types | Avoid |
|---|---|---|---|
| Straight (Type 1) | 14–21 days | Geometric, intricate patterns, multi-line | None — all designs work |
| Wavy (Type 2) | 10–14 days | Curved lines, simple shapes, single slash | Overly detailed freestyle |
| Curly (Type 3) | 7–10 days | Bold single lines, V-taper, hard part | Fine hairline multi-line designs |
| Coily (Type 4) | 5–7 days | High-contrast geometric, single bold line | Intricate multi-line patterns |
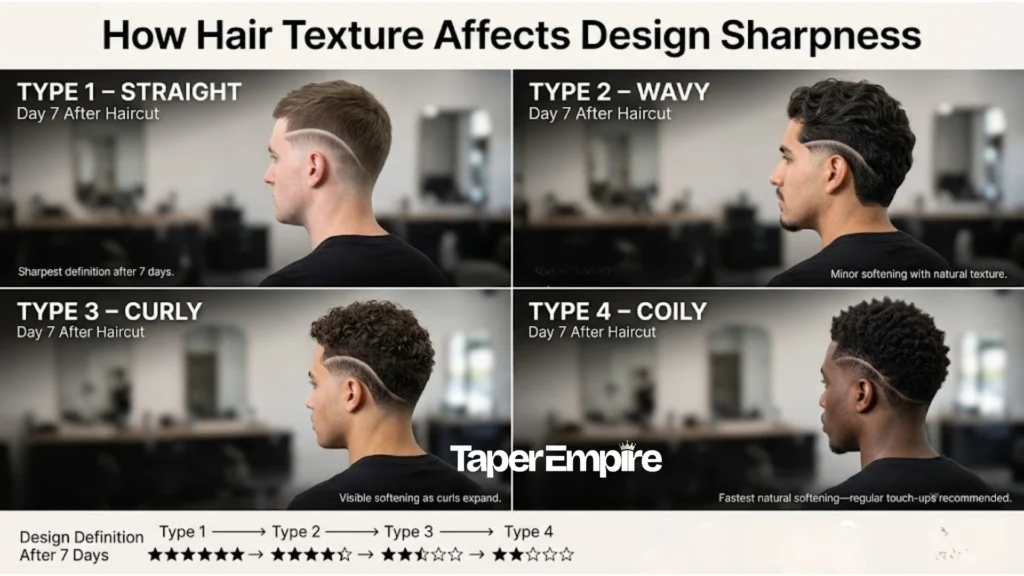
The reason designs blur faster on curly and coily textures is not just growth rate; it is also growth pattern. Type 4 hair grows in a tightly coiled spiral, so even a small amount of new growth can disrupt the clean edge of a shaved line. The coil physically obscures the border faster than straight hair growing in the same direction as the design.
Top Style Pairings
The top of the cut affects how much attention the back and side designs receive.
Textured Crop or Fringe: Pair with a minimal back design. A heavy crop creates visual weight at the top; adding an intricate nape design creates competing focal points that neither wins out. A single nape line or V-taper keeps the look balanced.
Slick Back or Pompadour: Pair with bold side or temple designs. The back of a slick back is largely hidden, so nape designs are wasted placement. A strong temple or sideburn design complements the volume on top.
Buzz Cut or Short Afro: Pair with nape-centered designs. The top is short and adds no competing focal point, so the back has maximum visual real estate to work with.
French Crop: The crop’s defined front fringe competes with side designs near the temple. Keep side designs subtle or position them closer to the sideburn than the temple.
If you have curly or coily hair and want mid taper designs that account for your specific texture, the dedicated guides for curly mid tapers and mid taper fade styles for Black men cover design-compatible options with texture-specific maintenance detail.
How Do I Choose a Design for Work vs. a Bold Statement?
The right design depends on three variables: your work environment’s dress code, how often you can visit a barber, and how bold you want the visual impact to be.
Design Appropriateness Scale
| Design Type | Visibility | Best For | Reconsider If |
|---|---|---|---|
| Single Temple or Nape Line | Subtle | Corporate offices, schools, interviews | You want maximum visual impact |
| Curved Slash or Hard Part | Moderate | Creative industries, retail, hospitality | Strict uniform or dress code applies |
| Geometric Shapes (Triangle, Chevron) | Bold | Events, personal branding, casual workplaces | Employer enforces conservative grooming |
| Freestyle (Lightning, Tribal, Initials) | Statement | Performers, content creators, weekends | Daily professional settings |
The single-line rule: if your employer requires formal attire daily, a single-line design is the only category that universally passes dress code scrutiny. Single lines read as intentional grooming rather than decoration at most formal viewing distances.
Creative and service-industry environments generally permit geometric designs. Freestyle designs are best reserved for settings where personal expression has no professional consequence.
A useful personal test: if you would feel uncertain answering a question about your haircut in a formal meeting, choose a subtler design. The best mid-taper design is one you can wear confidently in every context your week demands.
How Long Does a Mid Taper Design Last?
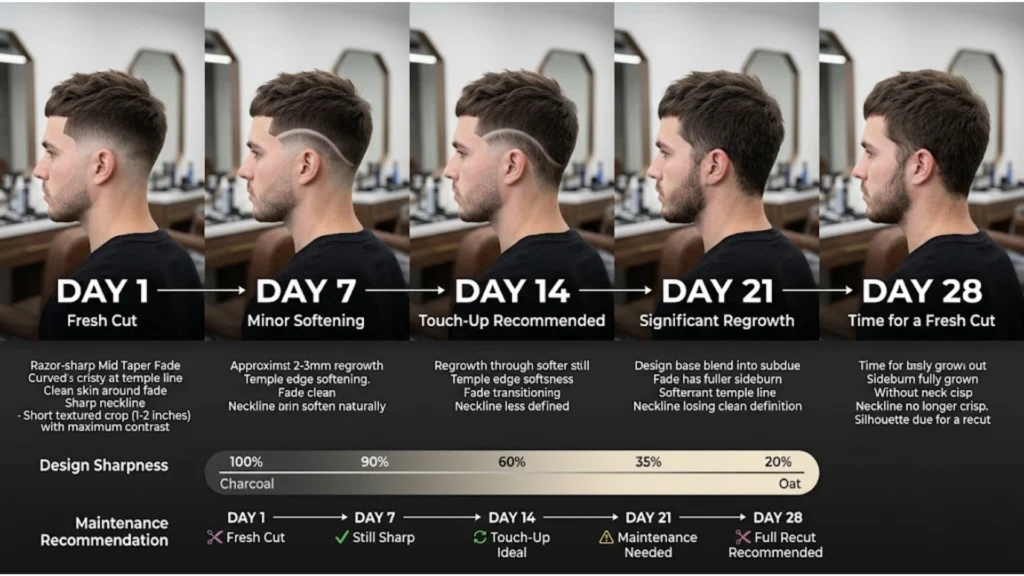
The base taper and the shaved design age at different rates, which is the point most guides omit. Most people schedule touch-ups based on the taper timeline and then wonder why the design disappears long before the cut looks grown out.
Mid Taper Design Growth Timeline
Day 1–3: Maximum sharpness. The design edges are crisp. The contrast between the shaved design and the surrounding hair is at its highest.
Day 7: The design remains clearly visible, but the edges begin to soften. The base taper still looks clean. This is the last point at which the design can be photographed at full impact.
Day 14: The design has blurred to approximately 50–60% of its original sharpness. On Type 3 and Type 4 hair, this blur begins earlier around Day 5–7. The taper base begins to lose definition at the nape.
Day 21: The design is nearly invisible on faster-growing textures. On straight hair, it is still faintly visible. The taper looks noticeably grown-out.
Day 28+: Full maintenance required a complete re-cut of the taper base and a fresh design execution.
| Service | Frequency | What’s Included | Approximate Cost |
|---|---|---|---|
| Design Touch-up Only | Every 10–14 days | Line-up + re-shave design (no taper re-cut) | $10–$20 |
| Full Refresh | Every 3–4 weeks | Complete taper re-cut + new design execution | $25–$50 |
Using an electric trimmer at home for neckline cleanup between visits can extend design visibility by 3–5 days. The risk: one pass too many over the design itself and the clean edge is gone. If you use a home trimmer, work only on the perimeter (sideburns and neckline edge) and leave the design untouched.
The honest trade-off with mid-taper designs is this: they require roughly twice as many barbershop visits as a basic taper. If a bi-weekly schedule is not realistic for your budget or time, a single clean line is the most maintenance-friendly design option; it ages more gracefully than geometric designs and still looks intentional on Day 14.
For the full step-by-step maintenance procedure, including product recommendations, home-care technique, and how to keep the taper base fresh between visits, the complete mid-taper fade maintenance guide covers the routine in detail.
What Mistakes Should I Avoid?
The most costly mid-taper design mistakes occur during the communication and design selection stages before the barber picks up the clippers.
5 Common Mid Taper Design Mistakes
1. Placing a horizontal nape line on a flat occipital bone: A flat occipital bone creates an uneven surface for a horizontal line. The line appears straight in the mirror at the barbershop but looks curved or irregular from a back-facing angle. Solution: choose a V-taper or asymmetric design that works with the bone structure rather than against it.
2. Ignoring a cowlick during design placement: A cowlick positioned near the design will distort the shaved line within 5 days as the hair grows back in its spiral pattern. Solution: tell your barber exactly where your cowlick is before they plan the design. An experienced barber will shift the design slightly off the cowlick’s center or use a curved line that follows the swirl direction.
3. Choosing intricate designs on fast-growing coily hair: Multi-line geometric or freestyle designs on Type 4 hair blur before the taper base even looks grown-out. The result is a cut that looks unkempt within a week despite requiring two-week maintenance. Solution: choose bold, single-line designs on coily hair; they age far more gracefully.
4. Not bringing a reference image: Describing a design verbally leaves too much to interpretation. “Something geometric on the back” can mean a dozen different things to a barber. Solution: take a screenshot of the specific design and angle you want, mark it clearly, and show it to the cutter before the cut begins.
5. Requesting a design that conflicts with your natural hairline: A straight temple line imposed on a naturally curved hairline will fight the hair’s growth direction and look crooked within a week. The most common version: requesting a sharp horizontal line at a temple where the hairline naturally curves upward. Solution: Ask your barber to assess the natural hairline before placing any design, and let them recommend an angle that follows the hair’s natural growth direction.
Frequently Asked Questions
What’s the difference between a taper and a fade?
A taper gradually shortens hair from top to bottom but stops before reaching the skin, ending at a #1 or #2 guard length. A fade transitions all the way to skin (0 guard) at the neckline or sides. Tapers look softer; fades create sharper, higher-contrast results that require more frequent maintenance.
How much does a mid taper with design cost?
A mid taper with a simple single-line design costs approximately $30–$50 in most US cities. Complex freestyle or geometric designs add $10–$20 to the base price. Touch-ups between full cuts, design refresh only, no taper re-cut, typically cost $10–$20.
Can I get a mid taper design if I have a cowlick?
Yes, but the cowlick location must be communicated to your barber before they plan the design. A design placed directly over a cowlick distorts within days as hair grows back in its spiral pattern. Barbers typically shift the design slightly off-center or use a curved line that follows the cowlick’s natural swirl rather than cutting across it.
Do mid-taper designs work for thinning hair?
Mid-taper designs work well for thinning hair when placed strategically. Avoid designs at the crown or top where thinning is most visible. Temple and nape placement keeps the design away from thinning areas, and the mid-taper’s gradual blend creates the appearance of fuller sides by removing the visual step that occurs when thinning hair meets shorter lengths.
What’s the best mid-taper design for a flathead?
A V-taper design or asymmetric curved slash works best on a flat occipital bone. Horizontal nape lines emphasize flatness by running parallel to the flat surface. Designs that create vertical or diagonal movement a downward V-taper, a temple-to-nape sweep draw the eye away from the flat back profile and add visual dimension.
How do I maintain a mid-taper design between barber visits?
Use an electric trimmer with the appropriate guard to clean up the neckline perimeter and sideburn edges every 7–10 days. Avoid touching the design itself; home touch-ups on shaved patterns almost always produce uneven edges that require professional correction. Focusing only on the perimeter hairline extends the cut’s overall freshness by 5–7 days between full appointments.
Key Takeaways
Mid-taper designs separate into three clear categories: simple, geometric, and freestyle, with the right choice determined by your hair texture, maintenance schedule, and environment. Back-view designs require nape-specific planning: the occipital bone structure dictates which pattern will stay even as hair grows. Side designs work best when they follow the natural hairline direction. The barber script framework removes the most common source of post-haircut disappointment: misaligned communication.
The two commitments every mid-taper design requires are realistic: a touch-up every 10–14 days for the design and a full refresh every 3–4 weeks for the base taper. If that schedule fits, the mid taper design delivers one of the most visually versatile results in men’s barbering.
Quick Tip
Before your next appointment, use Taper Empire’s AI haircut tool to preview your chosen design on your own photo. Download the result and hand it directly to your barber it eliminates interpretation guesswork on both sides of the chair.